This weekend my colleague brought to our office simple 20$ webcam. I have to say that my previous attitude to such toys was quite ambiguous. But idea to build home/office video security system based on such webcam(s) and Ubuntu changed my mind especially taking into consideration extremely low cost of end system and it’s capabilities. First of all I was interested in events replay, multiple camera zones and web interface. As it was discovered later, such system provides tons of useful features.
 In this post I’ll provide you with a free-style guide on how to set up home video security system that supports above mentioned features and is based on rather cheap webcams, free as beer software ZoneMinder and Ubuntu. I used Hardy Heron Ubuntu (8.04) for the installation but this guide should also work for 8.10 (Intrepid Ibex) and Jaunty Jackalope (9.04).
 The webcam we played with is manufactured by Logitech and has model name “QuickCam Chat”. It’s USB 2.0 camera that allows to capture video with 352×288 quality and 30 frames per second. Actually it’s more than enough for home security appliance. Thanks to heaven this camera is supported by U buntu by default as it works well with gspca/spca5xx driver.
You can check your webcam Linux compatibility here (it’s highly recommended to look through this list before buying camera). If your one is supported and column “Support” in above mentioned list is green it’s time to install drivers. Ubuntu users should execute the following command to install it:
sudo aptitude install gspca-source -yAfter it’s done, you should restart your computer or run
sudo modprobe gspca in order to load newly installed driver (don’t forget to plug your webcam). To check if driver is loaded normally you can run dmesg and look for “gspca” related lines, like these ones:
[15808.524000] usbcore: registered new interface driver gspca
[15808.524000] /home/viper/gspcav1-20070508/gspca_core.c: gspca driver 01.00.18 registered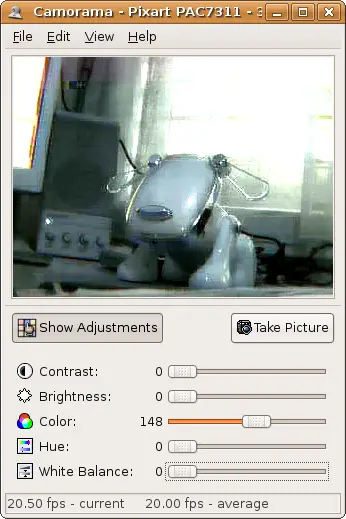 To check if your cam works okay with installed driver, there are two simple programs that can help you: xawtv and camorama (both can be installed with apt-get or aptitude). Just after you run one of these programs you should get clean picture. If it’s not clean there is no reason to proceed with this manual but to get your cam working (Google helps in most cases).
The next step is to install ZoneMinder – a heart of our system. As it comes from developers’ site, it’s top Linux video camera security and surveillance solution.
ZoneMinder is intended for use in single or multi-camera video security applications, including commercial or home CCTV, theft prevention and child or family member or home monitoring and other care scenarios. It supports capture, analysis, recording, and monitoring of video data coming from one or more video or network cameras attached to a Linux system.Installation procedure of ZoneMinder is extremely simple with Ubuntu:
sudo apt-get install zoneminder apache2 php5-mysql libapache2-mod-php5 mysql-server ffmpegif you use Dapper or Feisty I recommend you to read this. Once apt-get installation is finished run the following commands:
sudo ln -s /etc/zm/apache.conf  /etc/apache2/conf.d/zoneminder.conf

sudo
/etc/init.d/apache2 force-reloadAt this point ZoneMinder is installed, and you can load it’s control panel with your favorite browser (I hope it’s Firefox
 ): http://127.0.0.1/zm/ (replace 127.0.0.1 with IP address of computer you’ve installed ZoneMinder to). You should see empty ZoneMinder Console Page. If you see it the next step is to configure ZoneMinder, if you don’t it’s time to ask Google to help you or pray for gurus of this forum
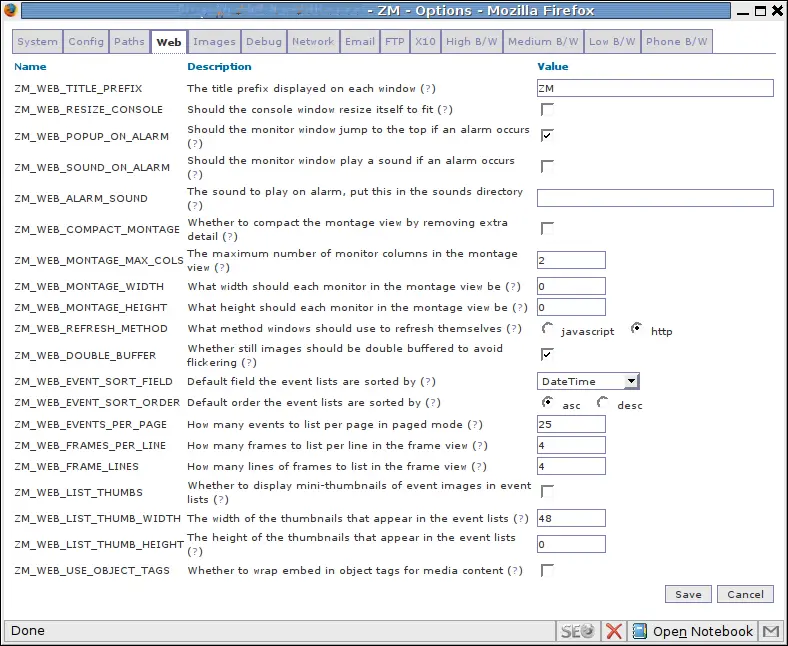
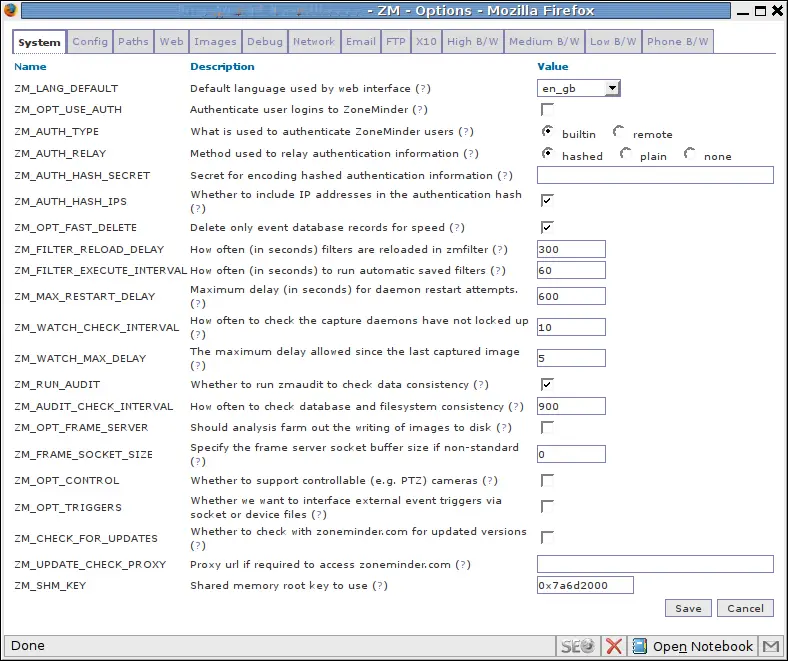
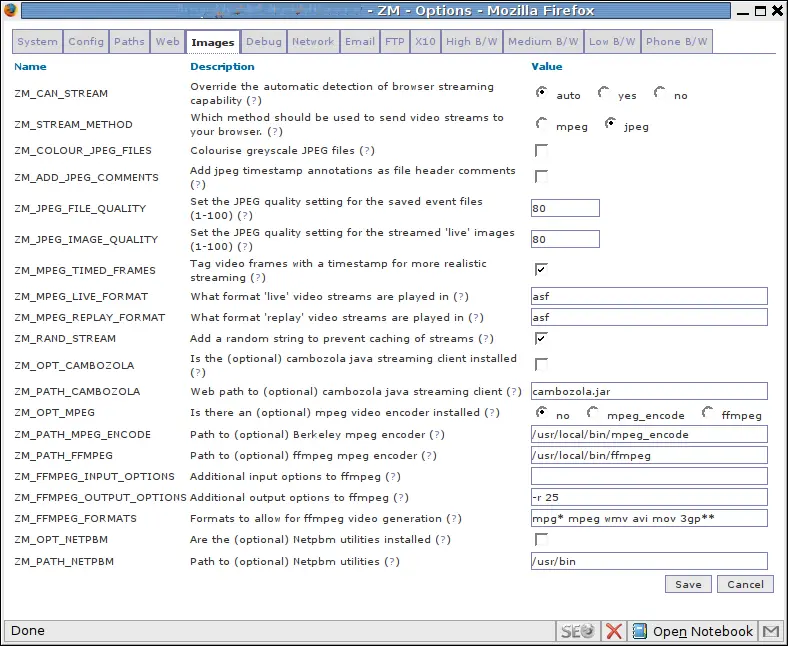
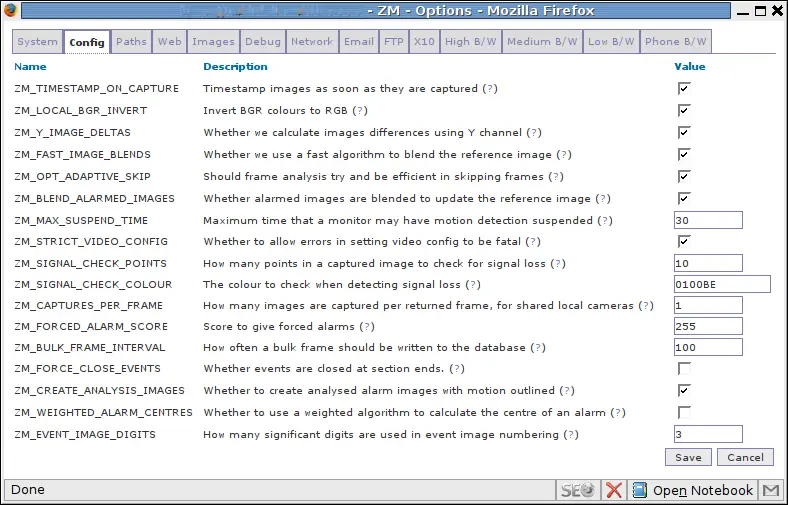
 Click at the “Options” of ZoneMinder Console to configure it. Here are screenshots of four main tabs:
 |  |
 |  |
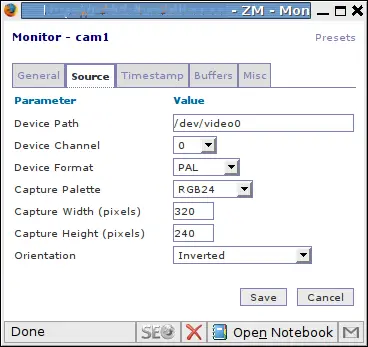
sudo /etc/init.d/zoneminder restart.The next step is to create camera monitors. Click at “Add new monitor” and fill up suggested fields as it’s shown at the following pictures:
 |  |
Don’t forget to set up function for newly added monitor (press appropriate link).


In case you have multiple cameras you should add more ZoneMinder monitors. That’s it, system is up and running.
By the way ZoneMinder has a lot of useful functions and is well documented, so I hope it won’t be difficult to set up certain feature.
Hope this manual helps you! And good luck!
P.S. You can use USB extension cables for your webcams to place them in unexpected places