 WordPress is a popular blogging tool powered by PHP and MySQL. WordPress has many features including plug-in support, customizable templates, and widgets that can be re-arranged easily without inserting a single PHP or HTML code. It can be easily customized into a content management system (CMS).
In this guide we will show you how to install the latest WordPress version locally on a system running Ubuntu 11.10 (Oneiric Ocelot) or Ubuntu 11.04 (Natty Narwhal). To be able to install WordPress on Ubuntu, you need first to install a web server supporting PHP and MySQL. You can findhere a tutorial explaining how to install LAMP (Linux, Apache, MySQL, PHP) on Ubuntu.
WordPress Installation
1. Download first the latest WordPress version (currently v3.2.1) using this command from the terminal:
wget http://wordpress.org/latest.tar.gz
2. Extract the archive file with this command:
tar -xzvf latest.tar.gz
3. Create now a folder for WordPress in the /var/www directory using this command:
sudo mkdir /var/www/wordpress
4. Now move all WordPress files to this created folder using this command:
sudo cp -r ~/wordpress/* /var/www/wordpress
5. If you are installing WordPress in a subdirectory not in the root directory (/var/www), then edit the apache2.conf file with this command:
sudo gedit /etc/apache2/apache2.conf
And at the end of the file, insert this line:
AddType application/x-httpd-php .html
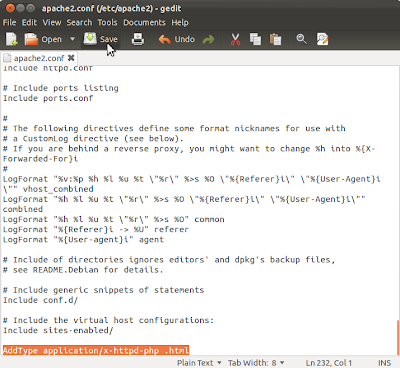
Save the file and close it.
6. Restart now Apache with this command:
sudo /etc/init.d/apache2 restart
7. Now we need to create a new MySQL database with a user having all privileges for accessing it. These details will be then inserted in the config file for WordPress. To create a new database, you may use phpMyAdmin, or simply run this command to login to the MySQL server (use the password you assigned to your MySQL server during LAMP installation):
mysql>
8. Create now a new database with this command (replace WordPress with any other name of your choice):
CREATE DATABASE WordPress;
If the command is successful, the returned output will be similar to this:
mysql> CREATE DATABASE WordPress;
Query OK, 1 row affected (0.01 sec)
9. Add now a new user with this command (replace "username" with any name of your choice):
CREATE USER username;
10. Assign a strong password to this new user with this command (replace "123" with your own password):
SET PASSWORD FOR 'username' = PASSWORD('123');
11. Grant now this user all privileges for the created database with this command:
GRANT ALL PRIVILEGES ON WordPress.* TO 'username' IDENTIFIED BY '123';
- WordPress --> Replace it with the name of the created MySQL database.
- username --> Replace it with the username you have just created.
- 123 --> Replace it with the password you assigned to the MySQL user.
12. Once you finish, run this command to exit the MySQL server:
exit
13. Rename now the wp-config-sample.php file to wp-config.php using this command:
sudo cp /var/www/wordpress/wp-config-sample.php /var/www/wordpress/wp-config.php
Note: If you are installing in another directory, then correct the given path to your own.
14. Edit now the wp-config.php file with this command:
sudo gedit /var/www/wordpress/wp-config.php
Insert now your MySQL settings you have just created by replacing:
- database_name_here ---> with the database name you have created. For this tutorial, it's named "WordPress".
- username_here ---> with the MySQL user you have created earlier.
- password_here ---> with the password you assigned to the MySQL user.
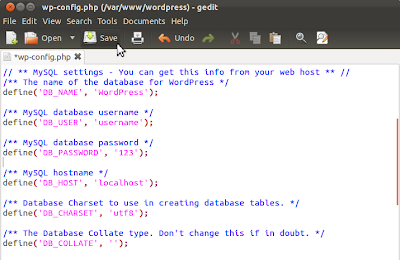
Save your file and close it.
15. Open now one of these two links to set up your WordPress admin details (you will be redirected automatically):
http://localhost/wordpress/
or
http://127.0.0.1/wordpress/
16. Fill now in the following web forms, then click Install WordPress:
- Site Title
- Username
- Password
- Your E-mail

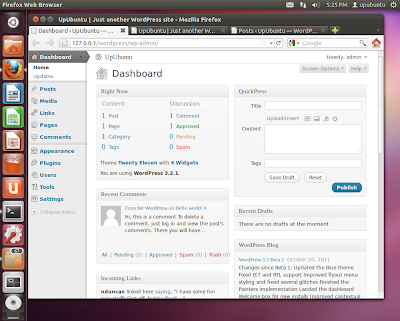
17. Login now to the admin section using the password you selected to start managing your blog:
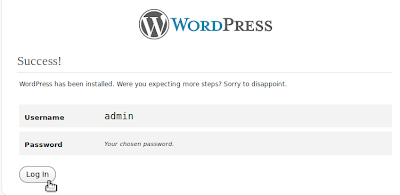
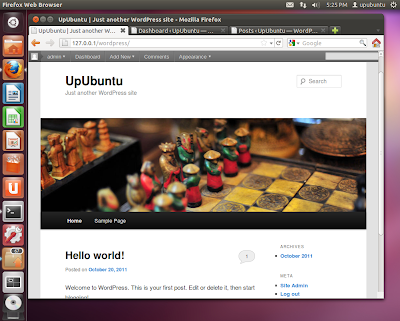
18. Congratulations! Your WordPress blog is now successfully installed. Your blog is live at this link:
http://localhost/wordpress/
The admin section can be accessed here:
http://localhost/wordpress/wp-admin/
That's it.